Scenario Creation Tutorial
The War Engine offers a powerful and easy to use scenario creation utility known simply as The Customizer. The Customizer (CZ for short) is the same (and only) tool Boku Strategy Games used to create all its various scenarios. This tutorial takes you through the steps to create your own scenario from scratch as well as tips for creating fun, interesting and exciting scenarios. This tutorial is meant to complement the manual and not replace it. It's recommended you read the Customizer section of the manual to understand the mechanics before going through this. (yea, right...) Please note that the images are smudged somewhat due to jpeg compression.
Getting Started
Start CZ and click the "Accept" or "Use Default" button. This means you'll use the graphics and sounds that came with the original game. The weapon, terrain and unit bitmaps are then loaded into CZ as well as the template scenario (TemplateScenario.wdk) in the game directory. On the left side of the window, you'll see a large dialog bar (which we'll call the Console Bar) showing a collection of terrain. On the right side you'll see a very basic battlefield. The window with the battlefield will alternately be the battlefield you're drawing or the area your army is shown when picking units.
Drawing the Battlefield
Note: Since this tutorial was written, a grid was added to the battlefield, making it much clearer where the tiles are.
~75% of scenario creation is spent drawing out the battlefield - at least a good one. It's by far the most interesting and rewarding aspect of TWE (outside of actually playing the scenario!) It definitely helps to know what the objectives are of the scenario and then build a map to fit them. But sometimes the map building takes on a life of its own and the objectives are later modified to fit what you have in front of you. Either way is fine. Here's a few tips for map building before we get into the mechanics:
Roughin' It
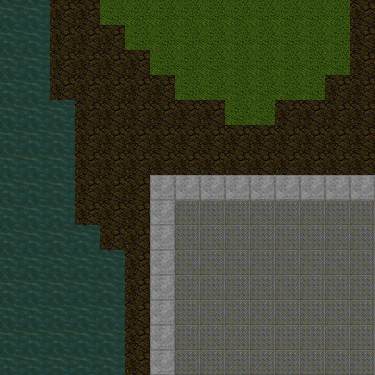
Once you have a general layout to your map, rough it out with basic terrain. You'll see to the right that I only used 5 different tiles. Water (tile #600), Ground (#515), Grass (#700), Cement (#79) and Steel Floor (#262). The Cement and Steel Floor will make up a building with a sidewalk around it.
The Transition
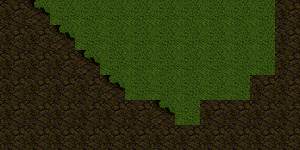
Once the layout is roughed in, get rid of the blockiness. This is a little tricky until you get the hang of it because you need to figure out which piece fits where to make a smooth transition from square to square. What I do is start with one type of terrain and look to see where it transitions to a different terrain type. For example, let's start with the grass. You'll notice that there are a number of grass tiles with the left and bottom side touching ground tiles. And a number of grass tiles have the right and bottom sides (or just the right or just the bottom) touching ground tiles. I'll start by picking a grass/ground transition tile to replace the grass that touches the ground on the left and bottom side. I then replace each of these tiles on the map with my new transition tile (#603):

I then do the same for the two tiles with a bottom transition (#691), the two tiles with the right side transition (#681) and the three tiles with both a right and bottom side transition (#607). Here's the result:
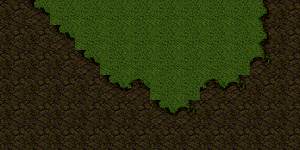
You'll notice the line between the ground and grass has some rough corners still sticking out:
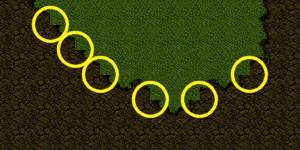
These are the corner transition pieces that tend to be the main culprit of frustration. They don't need to be though. We'll start by picking a grass tile with a ground transition in the left bottom corner. #604, shown here enlarged, will work fine.
![]()
I plug this into the left four yellow circles above. Because I'm replacing the grass tiles, I make sure I click on the green pixels (duh... but easy to get confused at times.) For the right bottom transition (right two circles), I'll choose tile #655. Plugged in, it looks like this:
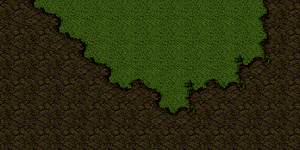
If you right click a tile in the battlefield, it will automatically be selected on the Console Bar. This is very useful in case you drop a tile in the wrong place. For example, if you drop a grass corner on a ground tile by mistake, you can right click a ground tile on the battlefield to select it and then left click the grass corner to replace it. You can then right click a (properly placed) grass corner on the battlefield to re-select it.
For each of the tiles that I chose to use, there are 2-3 alternates available. Don't worry about that for now though - we'll get to them.
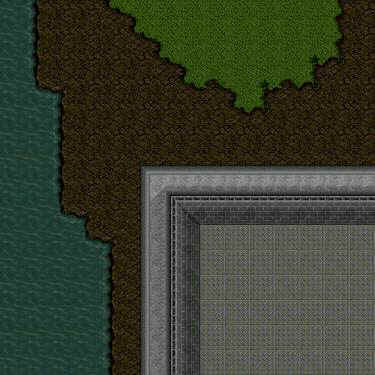
Moving back to the original water/grass/building/ground map from above, I use the same method for the Water-Ground transition. The building is much simpler since the corners and lines are well defined with no corner transitions involved. Page 2 of the terrain (tiles 100-199) are arranged to form a building making this a quick process. Note that walls are two tiles thick: the inside shows the wall itself, the outside shows the very top of the wall and the shadow it casts on the outside sidewalk. To transition from the ground to the building I use the Curbs centered around tile #581. Here's what it looks like:
Building Access and Hiding Places
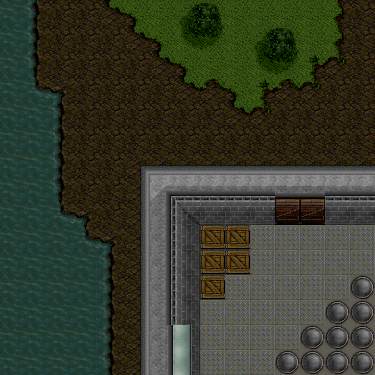
Your map is starting to take shape. Now's the time to throw in building access (doors/windows) and all the clutter. A tile of Tree terrain reduces visibility by 50%, so our 2x2 sized trees are good enough to hide behind and I'll put those on the grass. [If I want a large forest of trees, I'll go with the solid trees on the ride hand side of Terrain Page 8. (Note that these trees have tree/grass transition tiles for all sides, just like water/ground and ground/grass transitions.)] Lots of stuff can be thrown in buildings. I make sure there's a healthy number of crates, barrels, pipes and other paraphernalia to hide behind and impede progress:
Break it up and accessorize!
Now you should go back and break up the pattern along the grass/ground and water/ground transitions. For example, tile #604 shown above can be sporadically replaced with terrain tiles #556 and #570, both of which accomplish the same transition functionality, but look different.
![]()
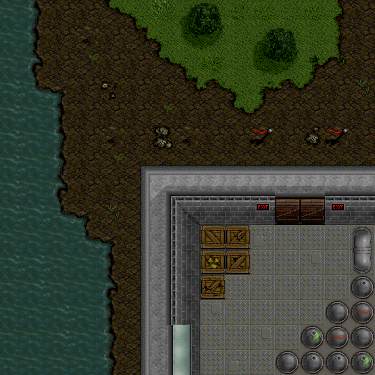
In addition to the transition lines, you'll want to do this with all solid areas of the battlefield: water, grass, building floors, ground, crates, walls, etc. Anything that offers alternatives should be used. I added different type of crates, put some rocks on the ground and a couple flags out front. I put in rough patches of grass and 'Exit' signs by the door in the building. All of this has the exact same functionality game-wise, but it's added to make a much more realistic and visually pleasing environment. Here's my final layout. You can see how sterile the previous picture looks compared to this one.
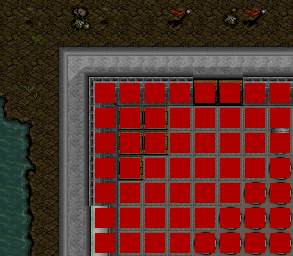
That's it for drawing out the battlefield but before moving on to picking the armies, you can add ammo or fog to the field, put in portals, define buildings and declare where each side is allowed to set up their armies at the beginning of a game. For our little map, we need to define the building as a building. This is very important, though easily forgotten. Without the building designation, the enemy will be able to fire indirect weapons over the wall and right on to you as if there were no ceiling! Click the "Building" button on the Console Bar and click and drag across the building tiles. The red squares are actually solid red, but appear smudged here due to jpeg compression. Here's the "Building" defined:
Picking the Armies
Picking armies is rather intuitive. When you select this Mode, the 50 templates will appear on the Console Bar nine at a time. If only a part of the larger units appear, that's because you haven't loaded in WDKUnits.frc and CZ thinks these are 1x1 units instead of 2x2 or 3x3. Here's the picking screen:
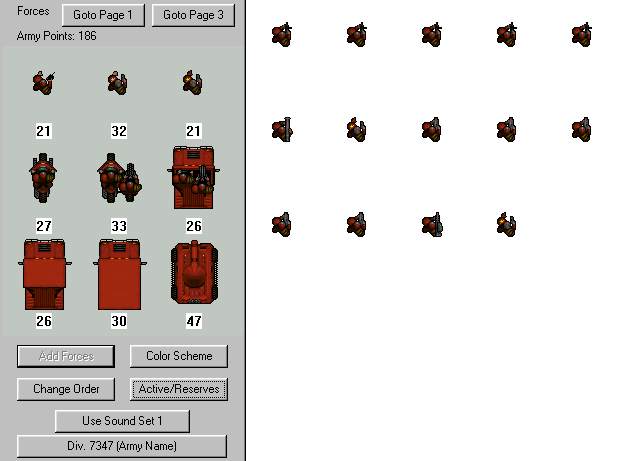
Not much to it, eh? You left click the template on the Console Bar to highlight it (with the dotted box) and then left click it again to add the unit to your army. The point worth is listed below each template unit with a tally at the top (186). When I create scenarios, I like to organize my units by squad. For me, a squad will consist of 5-10 standard marines (with Uzis or Lazguns), 1-2 heavies (Rocket Launcher, Heavy Lazgun, Flame-thrower, Comstruk...) and a Sergeant. For every 2-3 squads, I'll toss in a Captain to oversee things. I have two squads above. I like to visually separate my squads by 'painting' them different colors. For some reason, I like the bright colors...
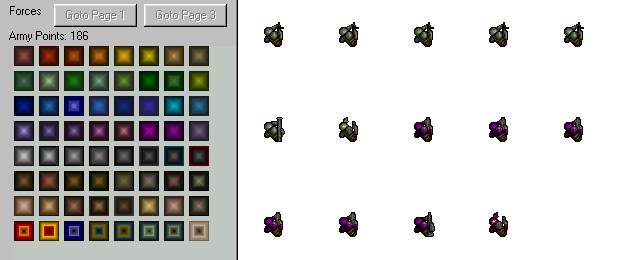
A few things left to do. I knew exactly what I wanted for an army and the order I wanted them in and picked them correspondingly. However, I could have picked all the lazgunners first, then all the uzis, sgts and heavies and then used the "Change Order" button to rearrange them. The order is followed when placing units on the field. Having the squads grouped together speeds this up immensely.
You'll want to click the "xxxxx (Army Name)" button to change the name of your army and the Sound Set button to assign the correct Panic, Recover, Acknowledgements sayings to the right army (Marines use Sound Set 1, Grunts use Sound Set 2).. Doesn't make so much difference for grunts and marines, but aliens wouldn't come across convincingly yelling "Augh!! I've been hit!!" in the queen's English. Last thing to do is make any modifications to the individual's stats, accomplished by right clicking the unit.
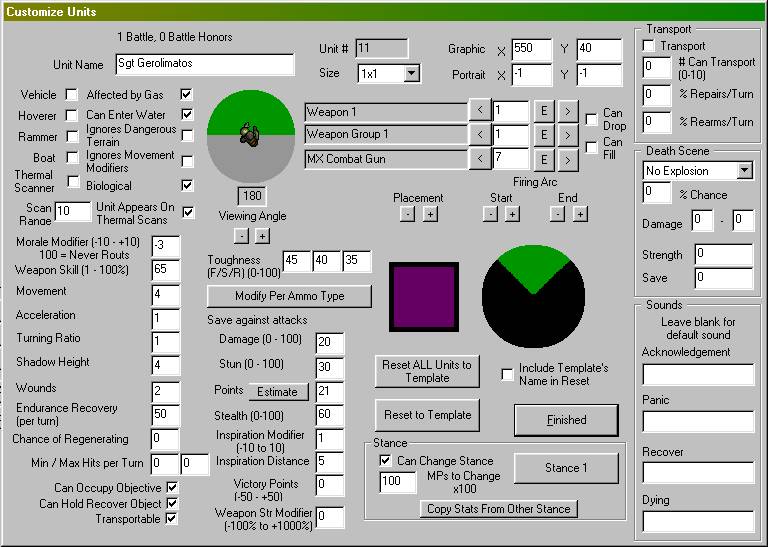
You can see there's a lot to work with!! Probably most important is putting names for the units. If not for all of them, at least the more significant characters. Note that if you change a template unit, the army units will not change to reflect it in any way. Once an army unit is created, the stats are its own. If you change a template and want it to reflect in the army, you'll need to either remove the unit from the army and add it back in or click on the "Reset to Template" button. "Reset ALL Units to Template" will take every unit in the army and re-sync it with the templates' stats. This is useful if you want to define new stats for number of the templates (maybe 6 MPs and 2 hits for each marine troop?) and have it reflect across the army.
When you're finished with one army, go ahead a pick the other.
Placing the Armies
Placing the armies is as simple as it oughtta be. The army units will appear, in order, on the console bar. You can change their facing by clicking on one of the eight buttons surrounding it. Then you click on the field where you want it to be placed.
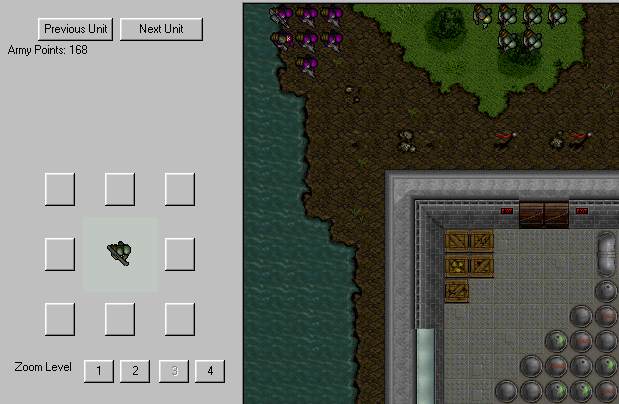
If the placement is illegal (boat out of water or units on impassable terrain, for example) nothing will happen. When you're placing Size 2 and 3 units, you click where you want the upper left corner of the unit to go. Of course it's different for each scenario, but I like to group the squads together at the beginning and out of sight of the enemy. This allows the player to employ his own formations and not waste movement trying to bring the squad together.
If the scenario is meant to be played against the computer, you'll want to right click each unit on the field and assign it a mission.
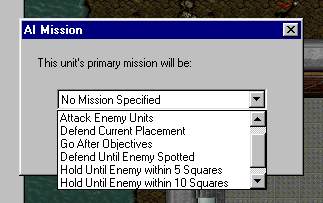
You should play around with each mission to see what works best for your scenario. I usually keep most units stationary until they're approached but throw in a fair number of moving troops (Attack Enemy Units) to keep harassing the player.
With this side placed, you're ready to place the other.
Specify the Ending
You should find that specifying the ending is quick and easy.
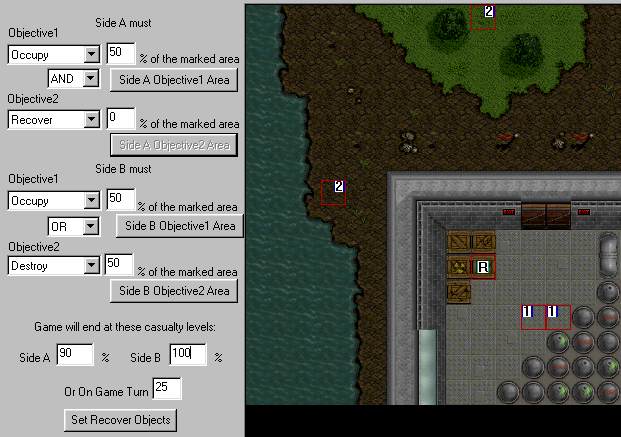
The trick is to read down the Console Bar. This says "Side A must Occupy 50% of the marked area and Recover (the Recover Object)." You can see the Objective 1 Occupy area inside the building. As long as one of these squares is occupied by a marine, the objective is met. If the objective were Destroy instead of Occupy, one of the squares (50%) would have to have its hits reduced to zero.
No percentage is associated with the Recover Object (designated with the 'R' and abbreviated RO). For the recover objective to be met, every RO on the field must be taken to a marked square - an Objective 2 area for the above. Since there are two Objective 2 squares and only one RO, the RO can be taken to either square. If there were two ROs defined, you have to take one RO to each square. If there were three ROs defined, the objective could never be met since a unit can only pick up one RO. (So don't do it.) Note that the ROs are not side specific. This means the marines could find the RO sitting around or in the back pocket of a grunt!
The Console Bar says that Side B must Occupy 50% of the marked area or Destroy 50% of the marked area. I didn't mark any Side B objectives on the map, so Side B doesn't have any.
In addition to the Objectives, you can define casualty levels that will cause an army to retreat or put a time limit on the game. I have the Side B casualty levels set to 100% meaning the Grunts will defend the building and RO to the last man..
That's It!!
With your battlefield drawn and armies picked and placed, you're now able to save your work as a scenario, load it into The War Engine and play it! If anything is unclear or you have further questions, head over the discussion area and feel free to ask the group! When you do create a scenario, send it in for others to play!